Pin to Blog is designed for easy use and it’s really as simple as clicking a button. Depending on which internet browser you use, there are different methods to bring your pin buttons to life.
Chrome:
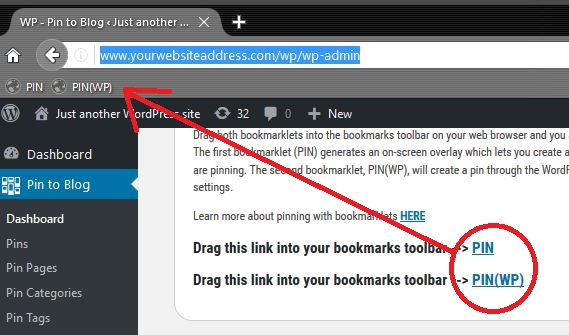
First, you will need to make sure that your “Bookmarks” bar is displayed in your browser. Once your “Bookmarks” bar is showing, simply drag and drop your pin button(s) into the Bookmarks bar and just like that, you are ready to begin pinning.
Firefox:
First, you will need to make sure that your “Bookmarks” bar is displayed in your browser. Once your “Bookmarks” bar is showing, simply drag and drop your pin button(s) into the Bookmarks bar and just like that, you are ready to begin pinning.
Safari:
First, you will need to make sure that your “Bookmarks” bar is displayed in your browser. Once your “Bookmarks” bar is showing, simply drag and drop your pin button(s) into the Bookmarks bar and just like that, you are ready to begin pinning.
Edge:
The process is slightly different for Edge users, yet just as easy. Instead of bookmarking your pin button(s), simply right click your mouse on either of the bookmarks in the Pin to Blog dashboard and select “Add to reading list” from the menu. Now, all you will need to do to create pins is to click on the hub icon, select your reading list (The icon with 5 horizontal lines) and there you will find your pin button(s). Your “Reading List” can be found under the “hub” icon (Three horizontal lines in top right corner of your browser window)